Should I Repair Stucco Myself or Hire a Professional?

Whether you should repair stucco yourself or hire a contractor depends on a variety of factors. Is it a hole or crack? How big of an area is in need of repair? Do you have experience with a DIY task such as this? Understanding what the job involves will help you make your decision, as will knowing the warning signs of a much larger problem that requires the expertise of a professional.
What Materials, Tools, and Time You Need to Repair Stucco
Using a medium-size hole as an example, let's take a look at the list of supplies you will need to complete the repair work.

Supplies:
- Gloves
- Eye protection
- Ladder (if necessary)
- Mason's chisel
- Hammer
- Wire brush
- Wire mesh, metal sheers, galvanized nails (if necessary)
- Stucco patching mix
- 5-gallon bucket
- Rubber float
- Paintbrush
- Paint
Patching products vary by the size of the repair. Read the manufacturer's instructions to confirm you have the right compound for the job.
Repair Steps:
- Remove any loose pieces of stucco using the mason's chisel and hammer, and then brush away any remaining debris with the wire brush. This will leave you with a clean surface to adhere the new stucco material.
- Inspect the wire mesh visible through the hole. If you see any damage, cut a replacement piece and attach it using the galvanized nails.
- Mix your stucco-patching compound according to manufacturer's instructions. Because the compound dries quickly, only use enough for a job that will take 15 to 20 minutes. It will become unusable after that amount of time, so you will want to mix just enough per repair site.
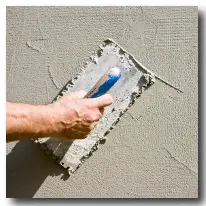
- Press ¼ inch of compound into the hole with the rubber float. Continue adding ¼-inch layers of compound until the repair sits flush with the surrounding surface.
- Clean the rubber float and remove excess material by rubbing the area with a circular, sweeping motion.
- Match the texture of the surrounding area if necessary; a whisk works for swirls and a sponge for a stippled finish.
- Allow the repair to cure for at least 24 hours.
- Repaint the repair to match the surrounding area. You also can add pigment to the stucco patching compound to pre-match it to the wall color, but because of the fast-drying time you may find the extra step reduces your repair time by too much.
From start to finish, each repair area of this size should take about an hour, less if you have previous experience working with stucco.
Benefits of Hiring a Contractor vs. DIY
Stucco in need of repair may be a sign of a more serious issue. Improperly mixed stucco may continue to be in need of repair as it crumbles from the exterior of your home. To avoid the regular work and the unsightly appearance of repair work that doesn't quite match the original application, you may want to have the top layer peeled away by a professional and reapplied.
Large cracks can be a sign of an improper installation, such as incorrect locations for expansion joints, base coat applied before the stucco has had time to properly cure and other poor construction practices. Again, you will want to consider removing and reapplying the topcoat to avoid large cracks developing over time.
House settling beyond the expected, extreme weather, and seismic activity can also lead to stucco damage. Having a professional handyman inspect your home and its foundation will help you unearth larger issues that can lead to higher cost than just stucco reapplication down the road. And whatever you do, do not put off stucco repair as doing so can lead to moisture becoming trapped behind your exterior wall causing repair costs.
Mr. Handyman can maintain your home to save you money. One call really does take care of everything on your to-do list. All Mr. Handyman franchises are Fully Insured with General Liability and Workers Compensation. Some services are subject to state and local licensing and may not be available in all locations. Make sure to stay on top of all your household repairs, improvements and maintenance needs and request service in your area.
 Click to call


